Welcome to 123ignitionusa
SHIPPING: Consider Signature Required for areas prone to Porch Pirates!
Alternator Instructions

These alternators are ready to install.
Charge your battery before installation.
Failure to do so WILL shorten the life of your alternator.
In the event your unit does not work:
1) Recheck your connections.
2) Make sure a good Alternator light bulb is in the circuit - dash.
Remember: NO ALTERNATOR LIGHT=NO CHARGING
Please Note! It may be necessary to reverse the large bushing on the mounting ear in order to fit properly.
Additionally, Check the clearance between the lower alternator adjusting arm and the alternator fan to make sure there is no binding after the install. If binding occurs, slide the lower arm off it’s post andcut or grind about 1/4 inch of material to get the proper clearance from the fan. If your belt doesn’tfit see your local auto parts store and take your old belt with you. They will be able to fit you upwith the right size belt. MGC required Napa #25-9420. A narrower number is 25-7410.
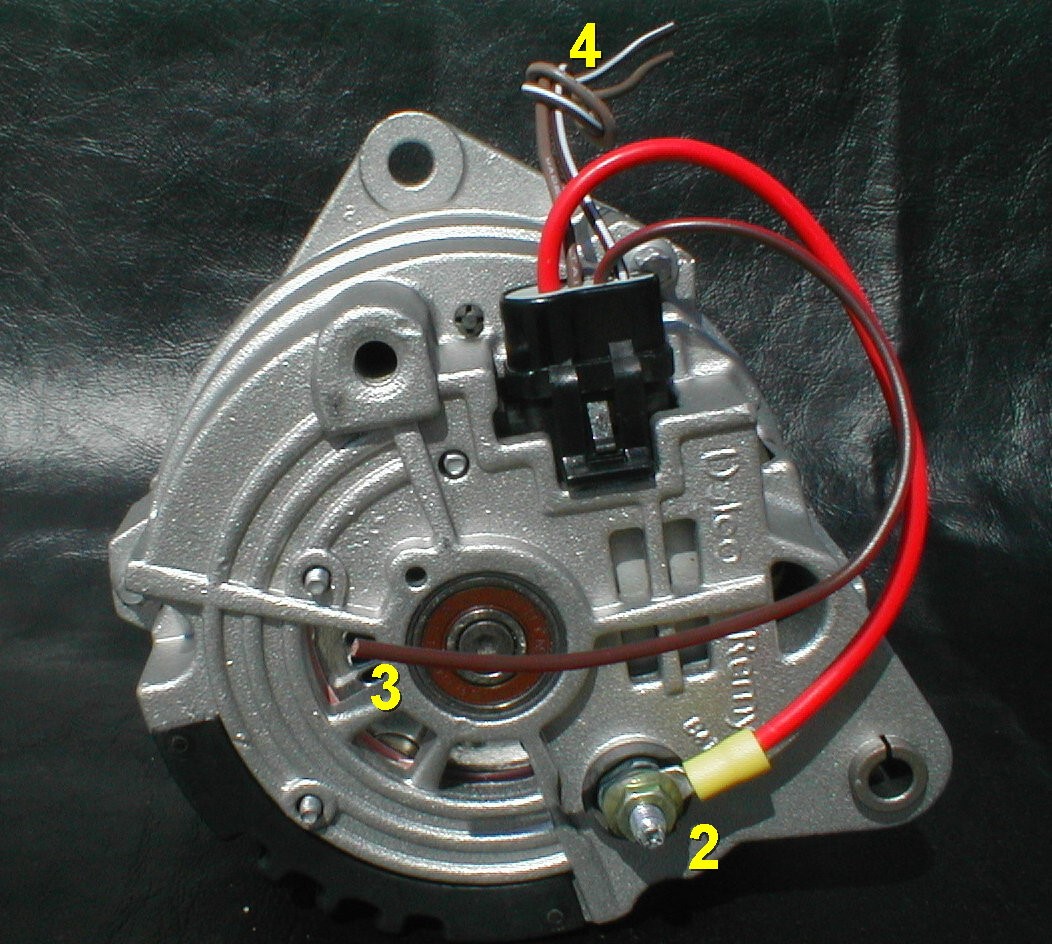
Wiring: You will only need to do some simple wiring.
1.) Remove the Lucas plug
2.) Using yellow eyelets (crimp/heat shrink coated) attach Large and Small Solid Brown wires from the starter along with the Large Red wire (S) on the new plug, to the battery post on the alternator.
3.) Connect the Small Brown (L) on the new plug to the Brown with yellow tracer from the wire harness (this is the alternator light on the dash and must be in good working order).
(All connectors are Heat Shrink)
4.) The remaining Brown wire (F) and Gray wire (P) on the new plug can be cut off If they are still present.
Please charge your battery before installation